Trolley
You have no items in your shopping cart
- Donatif
- General information
- 0 I like it
- 1052 Views
- 0 comments
- stress reduction, improved self-esteem, physical and mental well-being, gym training
READING TIME: 5 MINUTES ➤➤
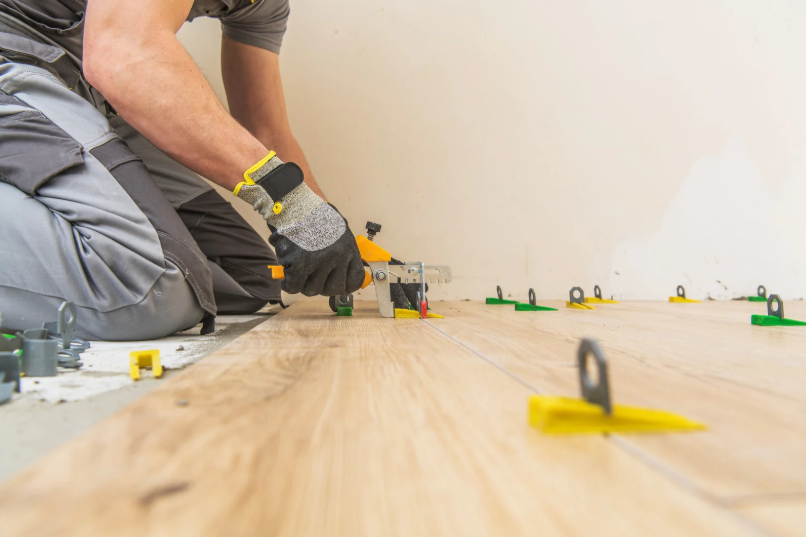
How to Install a DIY Gym Flooring Without Common Mistakes
Laying a DIY gym floor may seem, at first glance, like a simple and straightforward task. In reality, this very perception is what leads to the most common mistakes: underestimating key steps often results in unstable, short-lived, and visually uneven outcomes. Anyone setting up a home gym in a house or garage needs a clear, essential process without unnecessary complications.
This guide is designed to reduce confusion and help you move from a generic approach to a correct minimum procedure. No advanced technical skills are required, but it is crucial to understand which steps truly matter to achieve a stable, safe, and clean installation.
- Why installation isn’t as intuitive as it seems
- Surface preparation
- Easy-to-install materials
- Step-by-step procedure
- Mistakes to avoid
- Essential tools
Why gym flooring installation isn’t as intuitive as it seems
One of the most common mistakes is believing that a modular gym floor can simply be placed on the ground without any preparation. This belief comes from the apparent simplicity of interlocking systems, such as puzzle mats, but completely overlooks the importance of the base and proper alignment.
Starting without a clear method often leads to flooring that shifts, separates at the joints, or develops annoying uneven areas. This is not just an aesthetic issue: improper installation also affects stability during workouts, increasing the risk of premature wear and reduced material performance.
The most common myths about DIY installation
Many people think that “just snapping the pieces together” is enough to get a good result. In reality, even the simplest systems require attention to initial layout and space management. Another common myth is that any surface will work, when even small imperfections can compromise the entire structure.
These mistakes stem from an overly superficial approach that underestimates critical details. Understanding what to avoid from the beginning helps save time, materials, and frustration.
What happens when installation goes wrong
Poor installation leads to modules separating over time, creating gaps and instability. This is especially noticeable in high-use areas, where load and movement stress the system.
Additionally, a poorly installed floor tends to deteriorate more quickly, reducing the overall lifespan of your investment. This is why adopting a correct installation logic from the start is essential.
Properly preparing the surface before installation
The most underestimated yet most crucial phase is preparing the base. A stable gym floor always starts with a proper surface, regardless of the quality of the chosen modules.
Before starting installation, it is essential to ensure the surface is even and free from visible irregularities. Even small uneven spots can create tension between modules, leading to gaps or instability over time.
Checking the base and leveling
A visual inspection is not enough: it is helpful to run your hand over the surface to detect imperfections. If irregularities are found, simple solutions should be applied to improve flatness.
A stable base ensures that modules remain perfectly connected, preventing unwanted movement during daily use.
Cleaning and ideal conditions
The surface must be completely clean, dry, and free of dust or debris. Even seemingly insignificant particles can interfere with module adhesion.
A clean base makes installation easier and helps maintain a compact, long-lasting floor, reducing the need for future adjustments.
Choosing easy-to-install materials without complications
For beginners, material selection is crucial. Modular systems are designed to simplify installation, but not all offer the same level of ease.
Choosing intuitive solutions reduces the margin of error and ensures a more uniform result, even without prior experience.
Puzzle mats and EVA flooring: why they are ideal
EVA puzzle mats are one of the most accessible solutions for a home gym. Thanks to their interlocking system, they allow for quick installation without complex tools.
Their lightness and flexibility make them perfect for domestic environments, where practicality and functionality must be balanced.
When to choose rubber tiles
Rubber tiles provide greater stability and durability, making them ideal for those using heavier weights. Even in this case, installation remains relatively simple but requires more attention.
Choosing the right material simplifies the entire installation process and improves the long-term user experience.
Minimum correct procedure for installing gym flooring
Once the surface is prepared and the material is chosen, it’s time to proceed with the actual installation. Following a logical sequence helps avoid mistakes and maintain control throughout the process.
The key is to proceed methodically, without improvisation or skipping essential steps.
Step-by-step operating sequence
Start from one corner of the room, proceeding in a straight line while maintaining alignment between modules. Each piece must be fitted precisely, avoiding force.
Frequent checks allow you to correct any misalignments before they become difficult to fix.
Adjustments and cutting without mistakes
Along edges or irregular spaces, modules may need to be adjusted. In these cases, precise cuts are essential to maintain consistency across the surface.
Careful finishing contributes to a clean, professional result, even in a DIY context.
Common mistakes that compromise stability and durability
Many issues arise from seemingly minor mistakes that, over time, affect the overall quality of the flooring. Recognizing them in advance is the best way to avoid them.
Most of these errors are caused by rushing or lack of attention to detail.
Alignment and interlocking mistakes
Imperfect connections create tension between modules, eventually causing them to separate. Even a slight initial misalignment can worsen progressively.
This is why it’s essential to check every step and maintain consistent positioning.
Surface and spacing mistakes
Ignoring the condition of the base is one of the most serious errors. An inadequate surface makes even the best material ineffective.
Similarly, poor space planning leads to inaccurate cuts and a messy final result.
Essential tools for a simple and clean installation
One reassuring aspect of DIY installation is that complex tools are not required. With just a few basic items, you can achieve an effective and long-lasting result.
The key is using the right tools at the right time, without improvisation.
What you really need (without overcomplicating things)
The required tools are minimal and easy to find. This makes installation accessible even for those without specific DIY experience.
Focusing on essentials helps keep the process simple and manageable.
How to achieve a clean result
A clean result depends more on attention than on tools. Taking the time to properly align modules and finish edges makes all the difference.
By following a clear procedure and maintaining control at every stage, you can turn an uncertain task into a simple, precise, and satisfying operation.
Comments (0)