
Trolley
You have no items in your shopping cart

 Budgets
 Dumbers
 Discs
Discs
 Benches
 Racks and Rigs
 Weights Holders
 Isotonic machines
 Calisthenics
 Cardio
 Kettlebells
 Flooring
 Gym Set
 Accessories
 Combat
 ARTI MARZIALI
 CONTAINER GYM
 Tug-Of-War
 Used Gym Equipment
 PILATES MACCHINARI
 GINNASTICA ARTISTICA
 CAMPI DA PADEL
 Prodotti in Pronta Consegna
 Informazioni
 IRONMAN
 Gift Card
- Donatif
- General information
- 0 I like it
- 1482 Views
- 0 comments
- gym flooring, safety flooring, gym safety, shock-absorbing materials
Mini Bands for Glutes: 7 Effective Exercises Explained
Mini bands for glutes are among the most practical accessories for improving hip activation, control, and stability. They take up very little space, can be used at home, and help make movements more noticeable that, when performed with bodyweight alone, often involve the quadriceps or lower back too much. Whether you are a runner, a gym-goer, or simply looking to improve movement quality, mini bands can become a simple yet highly effective training tool.
The goal is not to choose “miracle exercises,” but to use the band correctly. Elastic resistance should create continuous tension without forcing the body to compensate. In this guide, you will find 7 mini band glute exercises explained in a practical way, including technical tips, difficulty levels, and guidelines for choosing the right resistance.
How to Use Mini Bands for Glutes
A mini band works well for glutes because it creates lateral or diagonal resistance, forcing the hip stabilizing muscles to engage during movement. This is particularly useful in exercises where the knees tend to collapse inward or the pelvis loses control. However, a band that is too strong can negatively affect technique: the body starts looking for shortcuts, shifting the workload to the lower back, tensor fasciae latae, or quadriceps.
To begin, it is best to use a light or medium resistance band and focus on the feeling of controlled outward pressure. The tension should remain present but should not restrict movement. In mini band glute exercises, quality matters more than the number of repetitions. A few well-executed reps are far more effective than long sets performed with unstable knees, misaligned feet, or excessive pelvic rotation.
Seven Mini Band Glute Exercises
The following exercises can be used as activation drills before squats, lunges, running sessions, or leg workouts, or as a light circuit at home. Depending on the exercise, the mini band can be placed above the knees, around the ankles, or around the feet. Generally, the farther the band is from the hips, the greater the leverage and therefore the challenge.
For the best results, perform every movement with a controlled tempo and avoid bouncing. The return phase is just as important as the pushing phase: if you let the elastic band pull you back, you lose part of the muscular stimulus and reduce control. Maintain steady breathing throughout and stop the set if you experience joint discomfort rather than normal muscular fatigue.
Glute Bridge with Mini Band Above the Knees
The mini band glute bridge is one of the most accessible exercises for feeling your glutes work without stressing the lower back. Lie on the floor, bend your knees, place your feet hip-width apart, and position the band just above your knees. As you lift your hips, gently push your knees outward and raise your pelvis until your knees, hips, and shoulders form a stable line.
The most common mistake is lifting too high and overextending the lower back. The movement should come from the glutes, not the spine. Hold the top position for a second, then lower yourself slowly without losing tension in the band. Beginners can start with 10–12 quality repetitions, while advanced users can increase the challenge by adding a longer pause at the top.
Seated Band Abductions
Seated abductions are useful for isolating the lateral glute muscles, particularly the gluteus medius. Sit on a bench or sturdy chair with your feet firmly planted and the mini band positioned above your knees. From there, push your knees outward in a controlled manner without moving your feet or leaning backward.
This exercise may seem simple, but it becomes effective when the movement remains small and precise. Avoid jerking the band with quick, explosive motions. The correct sensation is lateral tension in the glutes, not discomfort in the front of the hips. It works particularly well as a pre-workout activation exercise.
Lateral Band Walk
The lateral walk targets the glutes while improving pelvic stability. Place the mini band above the knees for an easier variation or around the ankles for a more demanding version. Slightly bend your knees, lean your torso forward just a little, and take small sideways steps while maintaining constant tension in the band.
The most important detail is preventing the knees from collapsing inward during the return step. Keep your feet pointing forward and avoid excessive side-to-side movement of the pelvis. Beginners can start with 8–10 steps per side. Once technique remains consistent, the number of steps or resistance level can be increased.
Squat with Mini Band Above the Knees
The mini band squat helps identify and correct inward knee collapse. Position the band above your knees, place your feet about shoulder-width apart, and squat down while keeping your weight evenly distributed across the entire foot. The band provides feedback: gently push outward without exaggerating or losing alignment.
This exercise is not simply about creating a “burn” in the glutes. Its primary purpose is to improve movement control. If your torso leans excessively forward or your heels lift off the floor, reduce the depth and focus on a more stable movement pattern. In many cases, a light band is more effective than a very strong one because it allows a more natural squat.
Clamshell with Mini Band
The clamshell is performed lying on your side with your knees bent and the mini band above your knees. Keep your feet together and lift the top knee upward without rotating the pelvis backward. The movement should remain controlled and relatively small. Once the pelvis starts moving, the useful range of motion has already been exceeded.
This exercise is beginner-friendly because it reduces load while encouraging better muscle awareness. To improve precision, place a hand on your hip and make sure the pelvis remains stable. If you feel more tension in the front of the hip than in the glute, reduce the range of motion and slow down the lowering phase.
Quadruped Kickback with Mini Band
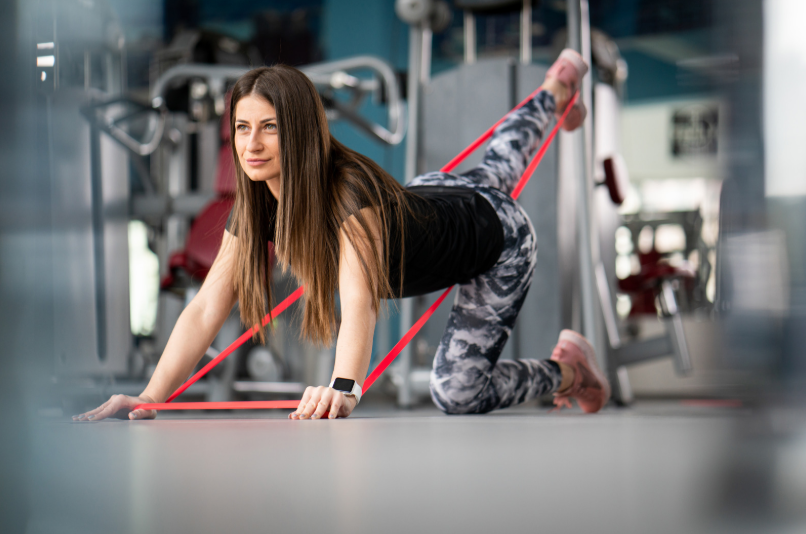
The quadruped kickback focuses on hip extension. Position the mini band around your feet or above your knees, depending on the variation. Start on all fours, brace your core, and extend one leg backward without rotating the pelvis. The foot should move in a controlled manner rather than through momentum.
The main risk is compensating by arching the lower back. To avoid this, imagine keeping your pelvis parallel to the floor while pushing your heel backward rather than upward. This exercise is useful when training glutes without heavy weights, but it requires attention to technique. If the band is too resistant, movement quality can deteriorate quickly.
Monster Walk with Mini Band
The monster walk combines lateral movement with hip control. Place the mini band above your knees or around your ankles, slightly bend your legs, and take small diagonal steps forward. The tension should remain constant, as though you are maintaining space between your knees throughout the entire set.
This exercise is especially beneficial for runners and athletes because it mimics the pelvic control required during dynamic movement. There is no need for large steps. In fact, overly long strides often lead to poor posture. Keep your torso stable, your feet pointing forward, and your pace controlled. A short, precise set is generally more effective than a long walk performed with compensations.
How to Structure Progression and Intensity
For beginners, selecting three or four exercises and performing two sets of 10–15 repetitions is a good starting point. For walking variations, 20–30 seconds per side works well. Progression should not immediately involve a stronger band. First, focus on improving control, useful range of motion, and the ability to maintain tension without compromising posture.
Once technique becomes consistent, you can gradually increase volume or move to a higher resistance level. A simple guideline is this: if you can complete all repetitions without wobbling, pain, or loss of glute engagement, it may be time to increase the challenge. If alignment deteriorates, the resistance is likely too high.
How to Choose the Right Mini Band for Glutes
For glute training, a mini band loop set with multiple resistance levels is often more practical than owning a single band. A light band is ideal for learning movement patterns and technical exercises such as clamshells or seated abductions. A medium band works well for lateral walks, squats, and glute bridges. Stronger bands should only be used when movement quality remains excellent.
Your choice also depends on training goals. Those using mini bands as part of a warm-up should generally prefer light or medium resistance, as the objective is activation rather than fatigue. Individuals using bands in home workout circuits can alternate resistance levels according to the exercise. Ultimately, the best mini band is the one that allows you to feel your glutes working while maintaining proper movement, posture, and control.
Adding these exercises to your routine can make training more structured and effective. They do not necessarily replace loaded squats, lunges, or hip thrusts, but they can improve movement quality and muscle awareness. For anyone looking to get started without heavy equipment, mini band glute exercises provide a practical, progressive, and highly adaptable solution.
Comments (0)