
Trolley
You have no items in your shopping cart

 Budgets
 Dumbers
 Discs
Discs
 Benches
 Racks and Rigs
 Weights Holders
 Isotonic machines
 Calisthenics
 Cardio
 Kettlebells
 Flooring
 Gym Set
 Accessories
 Combat
 ARTI MARZIALI
 CONTAINER GYM
 Tug-Of-War
 Used Gym Equipment
 PILATES MACCHINARI
 GINNASTICA ARTISTICA
 CAMPI DA PADEL
 Prodotti in Pronta Consegna
 Informazioni
 IRONMAN
 Gift Card
- Donatif
- General information
- 0 I like it
- 500 Views
- 0 comments
- gym flooring, safety flooring, gym safety, shock-absorbing materials
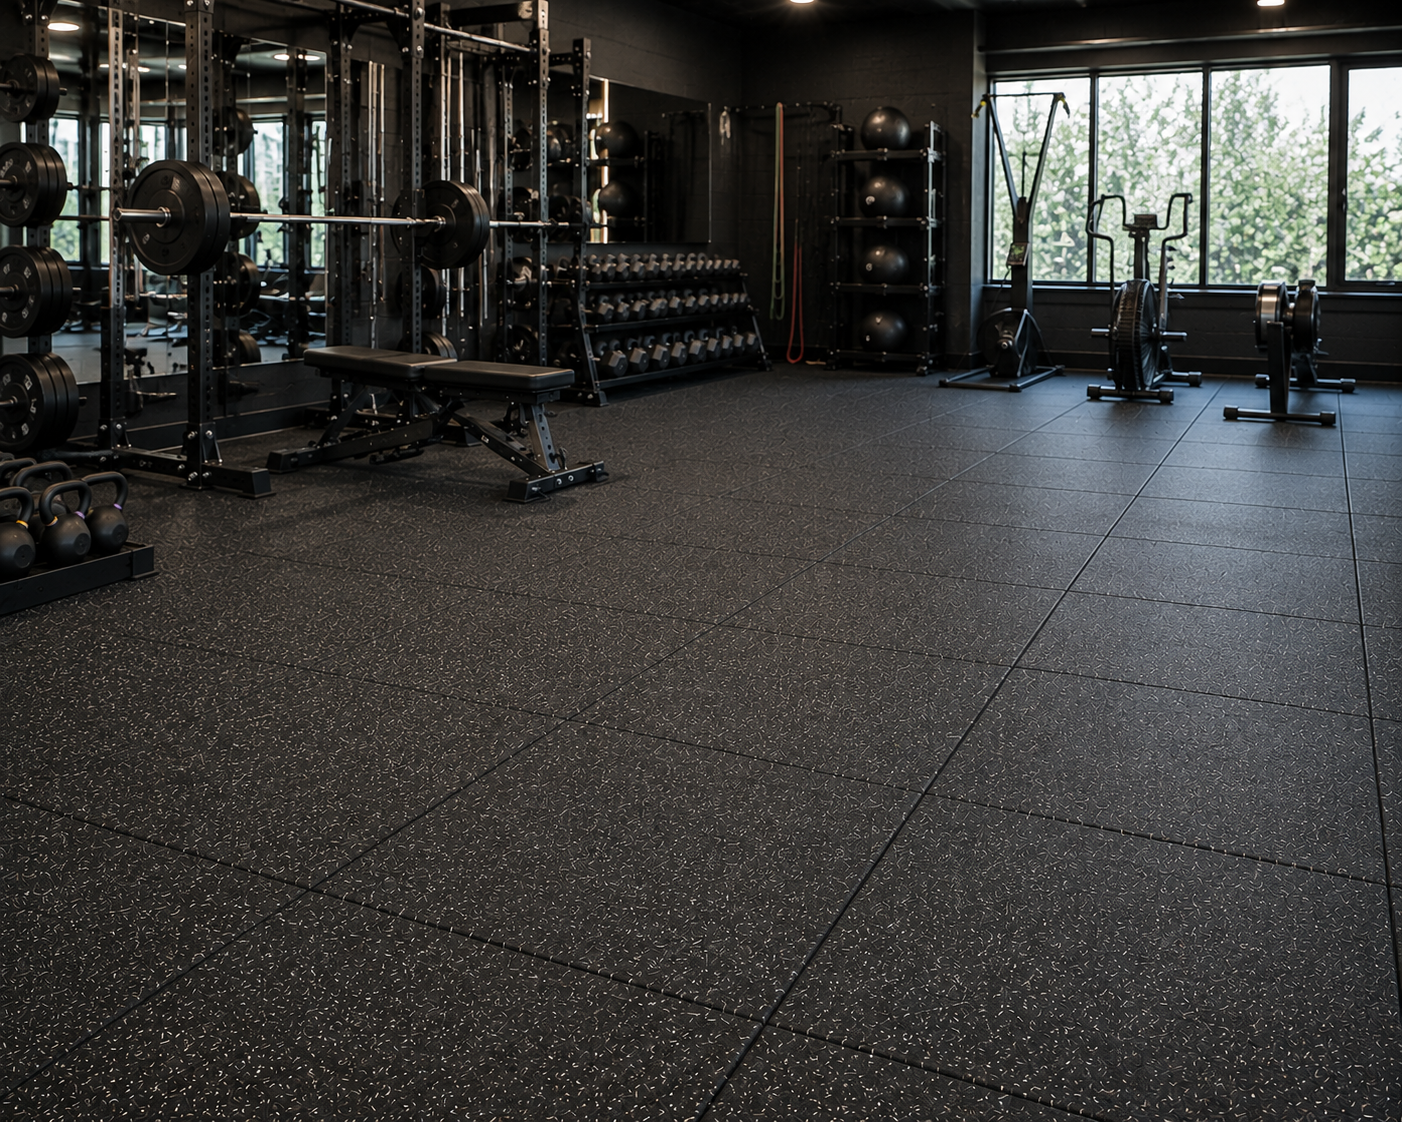
How to Install Rubber Gym Flooring: A DIY Guide
Creating a home gym or setting up a new fitness area may seem like a complex project, but with the right tools and proper planning, it is possible to achieve a professional result even without hiring a specialized installer. Gym flooring installation is one of the tasks that allows for the greatest savings on setup costs, provided you follow a few simple technical rules that ensure a stable, precise, and long-lasting layout.
Modern rubber tiles are designed to simplify installation. Many models can be laid without glue, taking advantage of the weight of the tiles themselves and the correct alignment between elements. This makes it the ideal solution for both home gyms and gyms that wish to maintain the ability to change the layout of the space in the future.
In this guide, we analyze all the fundamental steps: from preparing the subfloor to cutting the tiles, from laying the tiles to final checks. By following these tips, it will be possible to obtain a stable, safe, and durable floor while reducing material waste.
- Preparing the subfloor
- The necessary tools
- How to cut rubber correctly
- Laying the tiles step by step
- When to secure the floor and when not to
- The most common mistakes
- Checks and maintenance after installation
- Why proper installation protects your investment
Preparing the subfloor
The quality of the installation depends largely on the condition of the existing floor. Before starting, it is necessary to verify that the surface is clean, dry, stable, and as level as possible. Small imperfections can be compensated for by the rubber tiles, while significant dips risk compromising the stability of the entire floor.
Eliminating dust, residue from previous work, and moisture allows the tiles to adhere correctly to the subfloor, avoiding small movements during use. It is also advisable to check for cracks or unevenness that could make the final surface less uniform.
Before opening the packaging, it is useful to leave the tiles in the installation environment for a few hours. This way, the material adapts to the room temperature and is easier to position with precision.
Checking the floor level
A regular subfloor facilitates the alignment of the tiles and reduces the risk of creating unstable support points under heavy equipment.
Measuring the area accurately
Taking measurements before installation allows you to plan the layout of the tiles and limit waste, resulting in a more orderly and efficient outcome.
The necessary tools
One of the most appreciated features of modular flooring is that it does not require particularly expensive professional equipment. In most cases, it is sufficient to have tools that are easily found in a standard hardware store.
Among the most useful tools are a rigid tape measure, a square, a marker for drawing cutting lines, a professional cutter with new blades, a metal ruler, and a rubber mallet to facilitate the alignment of the tiles without damaging the edges.
Wearing cut-resistant gloves and using a stable surface during work increases safety and allows for much more precise cuts.
Essential tools
Sharp blades and precise measuring tools allow you to achieve a professional result even during a DIY installation.
Working safely
Proper organization of the workspace reduces the risk of errors and speeds up every phase of the assembly.
How to cut rubber correctly
Finishing operations represent the most delicate moment of the installation. The tiles must in fact be adapted to walls, pillars, and any obstacles present in the room without compromising the alignment of the entire floor.
To obtain a precise cut, it is advisable to use a metal ruler as a guide and score the surface with several light passes rather than attempting to cut through the entire thickness in a single operation. This method reduces effort and significantly improves precision.
When making complex cuts, it is useful to first create a cardboard template, verifying its correct positioning before transferring the shape onto the rubber.
How to cut gym rubber without errors
Using a new blade and proceeding with progressive incisions allows you to obtain regular edges and limit the risk of chipping or deforming the material.
Limiting waste
Planning the layout of the cuts in advance allows you to reuse many scraps in the perimeter areas, reducing material waste.
Laying the tiles step by step
Laying should begin from a perfectly square corner of the room, proceeding in an orderly fashion toward the opposite side. Always maintaining the same orientation of the tiles helps to obtain a uniform surface, even from an aesthetic point of view.
Each element must be placed without leaving obvious gaps, but avoiding compressing the rubber excessively. A light manual pressure or the use of a rubber mallet allows for precise joints.
During installation, it is advisable to frequently check the overall alignment using a straightedge or a long ruler to identify any misalignments before they become difficult to correct.
Correct anti-shock tile installation
Laying the tiles following an orderly pattern improves load distribution and helps keep the entire floor stable even under heavy equipment.
Leaving a small perimeter margin
Providing a slight space along the perimeter allows the flooring to adapt to normal dimensional variations due to temperature without creating tension.
When to secure the floor and when not to
One of the most frequent doubts concerns the need to glue the tiles to the floor. In most home gyms and weight rooms, the weight of the flooring and the equipment itself is sufficient to keep it stable without resorting to permanent adhesives.
Floating installation also offers the advantage of being able to easily replace any damaged elements or change the gym configuration without demolition.
Only in specific situations, such as areas subject to frequent movement of the tiles or very large surfaces, may it be appropriate to evaluate specific fixing systems indicated by the manufacturer.
Correct rubber flooring fixation
When required, the fixing system must be compatible with the flooring material and the type of subfloor to ensure perfect stability.
The advantages of glue-free installation
Floating installation facilitates maintenance, makes it easier to replace tiles, and allows you to move the flooring in case of a change of location.
The most common mistakes
Many problems arise from insufficient planning. Starting the installation without having verified the measurements or without having defined the starting point can generate irregular cuts and an unsatisfactory aesthetic result.
Another mistake is using worn-out blades. In addition to increasing fatigue, a dull blade tends to tear the material rather than cutting it precisely.
Neglecting to clean the subfloor can also compromise the stability of the flooring and promote small movements during daily use.
Avoid hasty cuts
Proceeding calmly and checking measurements frequently allows you to obtain much more precise finishes and reduce errors.
Verify every phase
Periodically checking the alignment of the tiles allows you to correct any misalignments before completing the entire surface.
Checks and maintenance after installation
Once installation is complete, it is advisable to carefully inspect the entire surface, verifying that there are no excessive gaps, lifted corners, or level differences between the tiles.
During the first weeks of use, it is normal to periodically check the stability of the floor, especially in areas subjected to the greatest loads such as racks, benches, and multi-function stations.
Regular cleaning with specific products keeps the material in excellent condition and helps preserve its mechanical characteristics over time.
The first cleaning
Removing any processing residue immediately after installation allows you to start using the gym in optimal conditions.
Scheduled checks
A periodic inspection of the most stressed areas helps to keep the flooring efficient and safe at all times.
Why proper installation protects your investment
Installing the floor correctly means enhancing the investment made. Even the best material can lose some of its performance if installed incorrectly, while a good installation helps to prolong its life and improve comfort during workouts.
Following an orderly procedure, using the appropriate tools, and dedicating the right amount of time to finishing allows you to obtain a result comparable to that of a professional installation, reducing costs without sacrificing quality.
To choose products designed for simple, precise, and durable installation, you can consult the solutions dedicated to gym flooring installation, identifying the configuration best suited to your home gym or fitness facility.
Comments (0)