
Trolley
You have no items in your shopping cart

 Budgets
 Dumbers
 Discs
Discs
 Benches
 Racks and Rigs
 Weights Holders
 Isotonic machines
 Calisthenics
 Cardio
 Kettlebells
 Flooring
 Gym Set
 Accessories
 Combat
 ARTI MARZIALI
 CONTAINER GYM
 Tug-Of-War
 Used Gym Equipment
 PILATES MACCHINARI
 GINNASTICA ARTISTICA
 CAMPI DA PADEL
 Prodotti in Pronta Consegna
 Informazioni
 IRONMAN
 Gift Card
- Donatif
- Sports products
- 0 I like it
- 4206 Views
- 0 comments
READING TIME: 7 MINUTES ➤➤
How to Install Rubber Gym Flooring: Step-by-Step Guide
Properly installing rubber gym flooring is a process that requires attention, precision, and technical knowledge. Whether you are a professional installer, an experienced craftsman, or a gym owner who wants to take care of every detail personally, this guide will walk you step by step through the entire process, from the subfloor to the final finish.
In this article, you’ll discover how to ensure an effective, safe, and long-lasting installation, avoiding common mistakes and following industry best practices. From subfloor preparation to material selection and tile interlocking, every phase is crucial to achieving a professional result.
- Why choose rubber flooring for your gym
- Preparing the subfloor: the role of the screed
- Installation steps for rubber flooring
- Mistakes to avoid during installation
- Professional tips for a long-lasting result
Why choose rubber flooring for your gym
Advantages in terms of safety and performance
Rubber flooring is the ideal solution for sports environments thanks to its ability to absorb impact and vibrations. Its elastic structure protects both users from injuries and equipment from damage caused by drops or impacts. In fitness environments, anti-slip safety and resistance to constant pressure are essential features.
Additionally, rubber flooring improves room acoustics by significantly reducing impact noise. This makes it particularly suitable for gyms in residential or urban buildings, where sound comfort is an added value.
Durability and maintenance over time
Another key advantage is the longevity of rubber flooring, which, if properly installed and maintained, can last for many years without losing its properties. It is resistant to wear, abrasion, and liquids, and can be easily cleaned with neutral products.
These features make it ideal not only for high-traffic gyms but also for personal training studios, CrossFit boxes, or home gyms that require a durable and reliable surface.
Preparing the subfloor: the role of the screed
Subfloor requirements before installation
Proper subfloor preparation is the first step toward a professional installation. The surface must be perfectly level, dry, and free of cracks or unevenness. An inadequate subfloor can compromise both stability and aesthetics, leading to lifting or deformation over time.
It is therefore essential to conduct a thorough preliminary assessment to determine whether leveling or structural repairs are needed. Any imperfections must be corrected before proceeding.
Types of screed suitable for gyms
The ideal screed for sports environments must provide a solid and uniform base. Self-leveling screeds are highly recommended, as they create a smooth surface even over large areas. These products are easy to apply and dry relatively quickly, enabling optimal installation of rubber flooring.
In environments with moisture risk, it is advisable to include a vapor barrier or use specific additives to prevent infiltration that could compromise the flooring over time.
How to properly level and clean the subfloor
After laying the screed, it is essential to wait for the curing time specified by the manufacturer before proceeding. Once dry, the surface must be sanded, vacuumed, and thoroughly cleaned to remove dust, grease, or any substances that could hinder adhesion.
Any uneven areas or depressions should be filled with leveling compounds to prevent post-installation movement. Only a perfectly clean and even subfloor ensures a durable, defect-free installation.
Installation steps for rubber flooring
Choosing the flooring type: interlocking tiles, rolls, or glued slabs
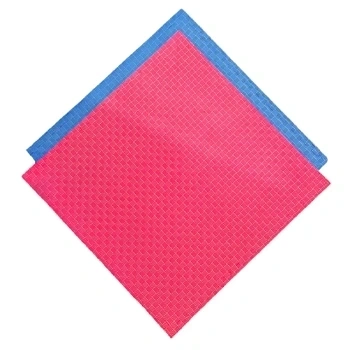
Rubber flooring for gyms comes in different formats: rolls, interlocking tiles, or adhesive slabs. Each option has specific characteristics that affect installation and final results. Interlocking tiles are perfect for dry installation and temporary setups, while rolls are ideal for covering large surfaces seamlessly.
The choice depends on functional needs and the type of training performed in the gym: areas with heavy loads require thicker materials and more robust installation systems.
Tools and materials needed for installation
To achieve a professional installation, you will need a few essential tools: a rubber cutter, metal ruler, rubber mallet, adhesive (if required), pressure roller, and level. Having everything ready before starting ensures continuity and efficiency.
If the system uses interlocking tiles, make sure each module fits perfectly and joints are consistent across the surface. For glued installations, carefully follow the manufacturer’s instructions.
Practical installation guide: step-by-step process
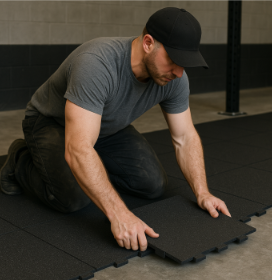
Always start from the center of the room or a defined reference point, laying the first rows perfectly straight. Proceed carefully, constantly checking alignment and correcting any deviations. With interlocking tiles, ensure each piece connects securely to the previous one.
Once installation is complete, apply even pressure with a roller if adhesive is used to ensure proper bonding. Allow the floor to rest for at least 24 hours before walking on it or placing equipment.
Mistakes to avoid during installation
Installing on an unsuitable subfloor
One of the most serious mistakes is installing on an uneven, damp, or poorly cleaned subfloor. This compromises the entire structure and can lead to detachment, swelling, or cracking over time. Proper preparation is therefore essential.
It is also not recommended to install directly over existing surfaces such as old tiles or carpets without proper technical evaluation. Each surface has specific adhesion and compatibility requirements.
Lack of material acclimatization
Before installation, rubber tiles or rolls should be left in the room for at least 24 hours. This acclimatization process allows the material to adapt to temperature and humidity, preventing expansion or contraction after installation.
Skipping this step can cause internal tension in the material, leading to lifting or uneven joints within a few days.
Uneven joints and poor interlocking
Another common mistake is lack of precision in joints, resulting in misaligned or overly wide gaps. Beyond aesthetics, this affects stability and can create tripping hazards.
To avoid this, each piece must be placed carefully without forcing, and alignment should be checked continuously. Consistent attention is key to a flawless result.
Professional tips for a long-lasting result
Post-installation maintenance
After installation, the floor should be cleaned with neutral, non-aggressive products and allowed to rest before use. Avoid placing heavy equipment directly on the surface within the first 48 hours, and maintain regular cleaning to preserve its anti-shock and hygienic properties.
For interlocking systems, periodically check that modules have not shifted, especially in high-traffic areas.
Final safety and adhesion checks
Finally, perform a thorough inspection of the entire surface to ensure there are no lifted edges, imperfect joints, or slippery areas. A gym floor must прежде всего быть safe for training and compliant with required standards.
By following these steps and paying attention to every detail, you will achieve a professional result that meets the highest expectations, ensuring comfort and safety over the long term.
Comments (0)