
Trolley
You have no items in your shopping cart

 Budgets
 Dumbers
 Discs
Discs
 Benches
 Racks and Rigs
 Weights Holders
 Isotonic machines
 Calisthenics
 Cardio
 Kettlebells
 Flooring
 Gym Set
 Accessories
 Combat
 ARTI MARZIALI
 CONTAINER GYM
 Tug-Of-War
 Used Gym Equipment
 PILATES MACCHINARI
 GINNASTICA ARTISTICA
 CAMPI DA PADEL
 Prodotti in Pronta Consegna
 Informazioni
 IRONMAN
 Gift Card
- Donatif
- Sports products
- 0 I like it
- 3626 Views
- 0 comments
READING TIME: 7 MINUTES ➤➤
DIY Gym Flooring: A Guide to Self-Installation
Installing DIY gym flooring is not only a cost-effective option, but also an opportunity to enhance your independence and create a customized fitness space. With the right information and suitable materials, even small facilities or home users can achieve professional results. This guide is designed to walk you step by step through the installation of modular or interlocking gym flooring, with a focus on cost efficiency and ease of assembly.
- Why choose DIY for gym flooring
- Types of flooring suitable for DIY installation
- How to install gym flooring step by step
- Useful tips for a professional result
- How much does affordable gym flooring cost
- Conclusions: independence and savings with DIY
Why choose DIY for gym flooring
Practical and psychological benefits of self-installation
Choosing to install your gym flooring yourself offers numerous advantages. From a practical standpoint, it eliminates labor costs, gives you full control over the result, and allows you to work at your own pace. There is also a strong element of personal empowerment: completing your own fitness space brings satisfaction and helps create an environment tailored to your needs.
Additionally, DIY installation allows you to gain skills that will be useful for future modifications or other home projects. In a context where well-being also involves managing and optimizing your own spaces, this type of activity takes on even greater value.
When it really makes sense to do it yourself
DIY is not always the best solution, but for small to medium-sized spaces—such as a home gym or a fitness studio—it can be ideal. Modern materials, such as interlocking gym flooring, are specifically designed to simplify self-installation, even for beginners. The key is to choose high-quality products and carefully follow instructions, avoiding improvisation or excessive cost-cutting that could compromise durability.
Types of flooring suitable for DIY installation
Interlocking flooring: how it works
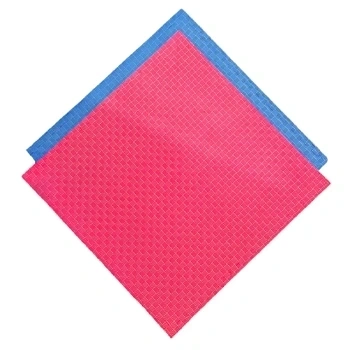
Interlocking flooring is the most common solution for those seeking quick and clean installation. It consists of rubber tiles, often made of EVA or PVC, with specially shaped edges that connect like puzzle pieces. The interlocking system ensures stability, ease of assembly, and the possibility of replacing individual tiles if damaged. It also requires no glue or special tools, making it accessible even for beginners.
These solutions are ideal for activities such as light weight training, functional workouts, or yoga. In addition to easy installation, they provide good sound insulation and joint protection.
Modular and customizable solutions
Beyond interlocking tiles, there are other modular options suitable for a DIY approach. Some variants include mechanical locking systems or self-laying tiles with anti-slip backing. These solutions combine aesthetics and functionality, allowing you to create different zones within the same space, such as cardio, weightlifting, or mobility areas.
Modularity is also a major advantage in terms of maintenance and adaptability. In case of relocation or expansion, the flooring can be easily dismantled and reused, avoiding waste and additional costs.
How to install gym flooring step by step
Preparing the area and necessary tools
Before starting installation, it is essential to properly prepare the area. The surface must be dry, clean, and level. In case of irregularities, it is advisable to use a leveling underlay or choose thicker tiles. Required tools include a sturdy utility knife, a metal ruler, a measuring tape, and optionally knee pads for added comfort.
It is important to dry-fit the tiles before final installation to check coverage and necessary adjustments. This step reduces errors and optimizes the final result.
Installation steps: from the first tile to finishing
Installation usually starts from one corner of the room, proceeding along a wall and then extending inward. Tiles should be placed carefully, ensuring edges align perfectly. For maximum stability, it is helpful to stagger the joints between rows, avoiding a “grid” effect.
Once installation is complete, finishing cuts are made along the walls using a ruler and utility knife. It is essential to leave a small expansion gap, especially in environments subject to temperature changes. Finally, check overall stability by walking on the surface and correcting any uneven areas.
Useful tips for a professional result
Best practices for stability and durability
To achieve a long-lasting and stable result, attention to detail is crucial. Even pressure during installation, the use of high-quality tiles, and proper subfloor preparation greatly affect the final outcome. Working in pairs—one placing tiles and the other checking alignment—can improve precision. If installing on a cold surface (such as concrete), using an insulating underlay can enhance comfort and durability.
Maintenance is also important. Even though many modular floors are durable, regular cleaning with neutral, non-abrasive products helps preserve anti-slip properties and aesthetic quality.
Handling corners, walls, and cuts
Edges and corners require special attention. Precise cutting ensures a perfect fit and prevents tiles from shifting over time. Use a sharp utility knife and proceed slowly, making multiple passes if necessary. Where possible, use rubber edging or border profiles to improve aesthetics and safety.
When dealing with irregular walls or fixed elements (such as anchored equipment), creating cardboard templates can help guide cuts. This method improves accuracy and reduces material waste.
How much does affordable gym flooring cost
Factors that influence price
The cost of affordable gym flooring depends on several factors: thickness, material, brand, and quantity purchased. EVA tiles are generally more affordable, making them ideal for home use and light activities. Rubber or PVC options offer greater durability and are better suited for intensive use, but come at a higher price.
Design also impacts cost: anti-slip surfaces, shock-absorbing textures, or aesthetic finishes may increase the final price. It is important to evaluate the intended use to balance budget and performance effectively.
Where to find the best deals
The most affordable solutions are often found online, on fitness marketplaces or DIY platforms. It is possible to compare prices, read reviews, and take advantage of seasonal promotions or clearance deals. Physical specialty stores may also offer выгод packages, especially for bulk purchases.
Many manufacturers also provide online calculators to determine the required quantity based on the area to cover. This helps avoid unnecessary purchases and optimize investment. Don’t forget to consider shipping costs or additional accessories such as edging or underlays.
Conclusions: independence and savings with DIY
Balancing quality, effort, and satisfaction
Installing gym flooring yourself is a rewarding choice for those looking to save money, maintain control over the outcome, and actively participate in creating their fitness environment. With the right materials and proper guidance, DIY becomes not only feasible but also highly satisfying. The final quality depends on attention to detail, patience, and personal commitment.
The installation process can become a moment of growth and self-efficacy, strengthening the connection between body, space, and motivation. It is an option worth considering, especially from the perspective of independence and resource optimization.
When is the right time to start
The ideal time to start is when you have a clear goal: transforming a space into a functional, safe, and motivating environment. Whether it’s a room at home, a garage, or a small fitness studio, the right flooring can make all the difference. And choosing to install it yourself makes the process even more personal and rewarding.
By following this guide, even beginners can approach the project with confidence. The key lies in preparation: understanding materials, planning each step carefully, and believing in your ability to succeed.
Comments (0)