
Trolley
You have no items in your shopping cart

 Budgets
 Dumbers
 Discs
 Benches
 Racks and Rigs
 Weights Holders
 Isotonic machines
 Calisthenics
 Cardio
 Kettlebells
 Flooring
 Gym Set
 Accessories
 Combat
 ARTI MARZIALI
 CONTAINER GYM
 Tug-Of-War
 Used Gym Equipment
 PILATES MACCHINARI
 GINNASTICA ARTISTICA
 CAMPI DA PADEL
 Prodotti in Pronta Consegna
 Informazioni
 IRONMAN
 Gift Card
- Donatif
- General information
- 0 I like it
- 207 Views
- 0 comments
- gym flooring, safety flooring, gym safety, shock-absorbing materials
How to properly use an hip thrust bench: a practical guide
The hip thrust is a hip extension exercise often proposed to train the glutes. A dedicated bench provides a support point for the upper back, but the presence of the equipment does not automatically make the execution correct. Height, foot distance and load control must be adapted to the person and the available model.
To understand how to properly use an hip thrust bench it is necessary to distinguish the station setup from the movement technique. The bench must remain stable, the load must be manageable and the user must be able to get in and out of position without improvised maneuvers.
This guide is designed for instructors and room managers who want to organize consistent explanations and checks. The guidelines are general: the manufacturer's instructions and the observation of a qualified professional take precedence over standard solutions when equipment or person require adjustments.
- Set up the station
- Find the starting position
- Perform the repetition
- Adjust the technique to the person
- Frequent mistakes to recognize
- Load, sets and progression
- Manage the station in the gym
Set up the station
Choose a stable surface
Place the bench on a flat floor compatible with its supports. Before loading the barbell, verify that it does not slip and that the support is positioned according to the instructions. A mobile bench, an uneven surface or an incompatible accessory can alter the support during the set.
Leave enough space in front and on the sides to position the plates and allow the instructor to pass. The area must remain free from dumbbells, bottles and other obstacles. Do not block exits or gym pathways: the station must be usable even during the preparation and tidying phases.
Check the equipment
Visually examine the frame, padding, feet and fasteners. If the bench has adjustments, make sure the devices are inserted and locked according to the manual. Report abnormal movements, damaged components or coverings that compromise support and suspend use when necessary.
Verify that barbell, plates and closure systems are compatible and correctly assembled. A barbell pad can distribute pressure on the pelvis, but must stay in place and not hinder the grip. Do not use unstable shakers or improvised solutions to change the height.
Find the starting position
Rest the upper back
Sit in front of the bench with your upper back resting on the support. The precise point varies based on body type and bench conformation: look for a stable contact that allows the torso to move without annoying pressure on the neck. The instructor can observe the path during a trial without load.
Avoid resting your head on the edge or pushing your neck against the bench to gain height. The support must sustain the movement of the torso without forcing the person to look for balance at each repetition. If the support is not comfortable, check adjustment and compatibility before increasing resistance.
Arrange feet and load
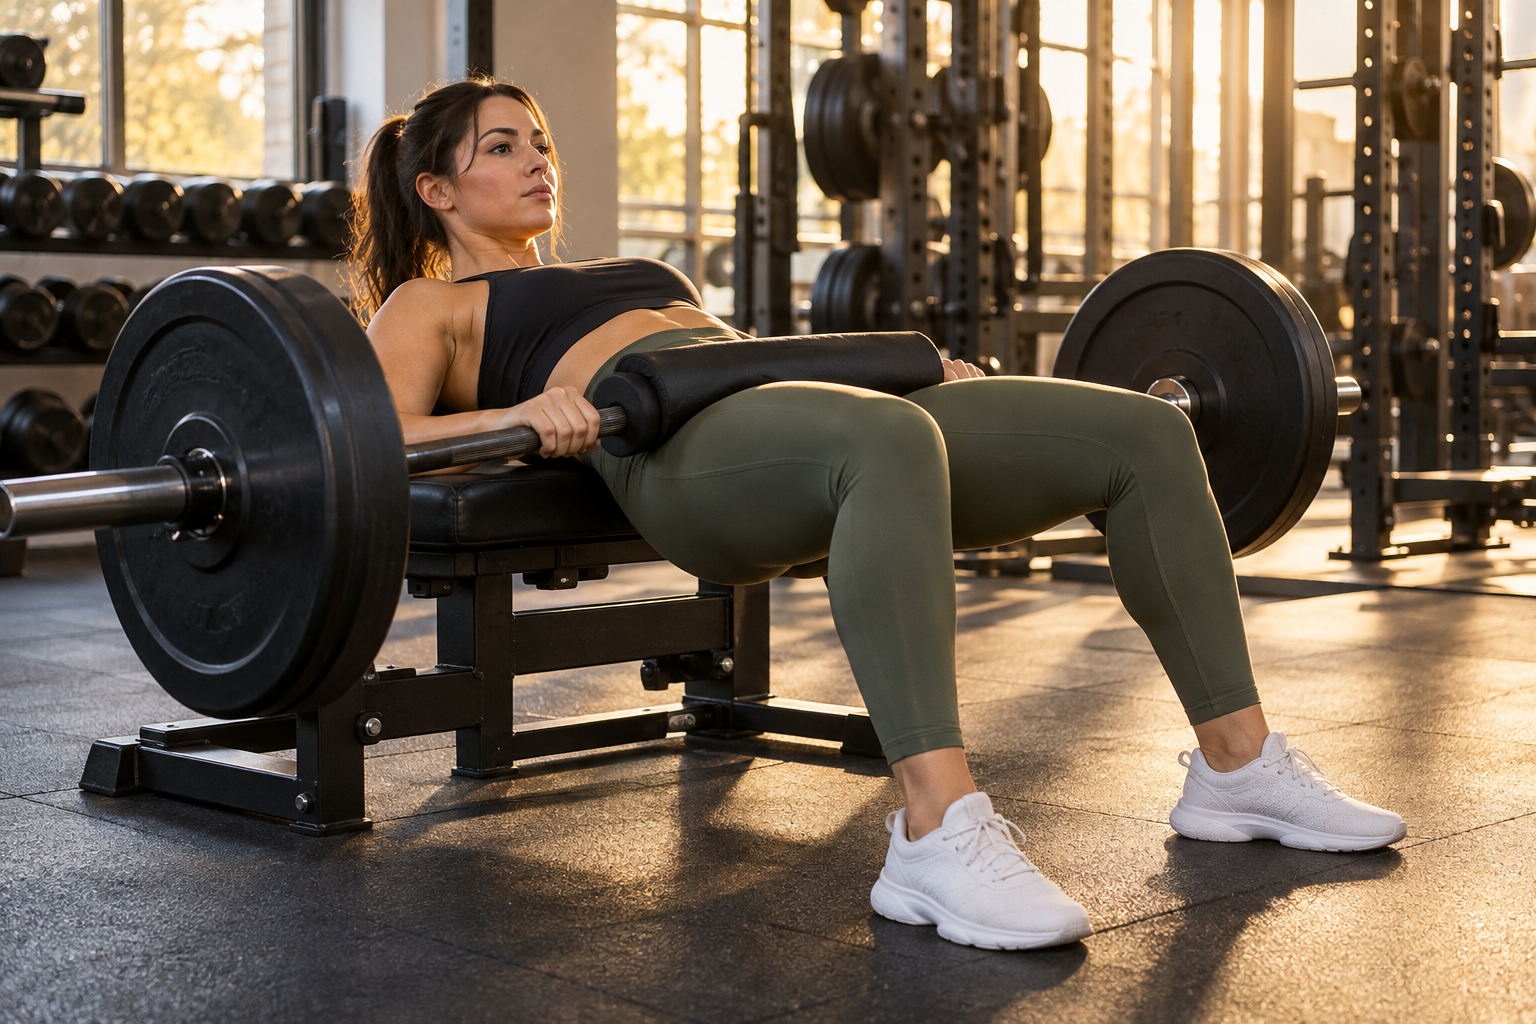
Bend your knees and place both feet on the ground, initially at a distance similar to hip width. Position the barbell on the hip crease with the appropriate pad and hold it with both hands. Start without additional load if you need to learn position and trajectory.
Foot distance should be tested at the high point of the movement: for many people a shin close to vertical can be an initial reference, not a universal rule. Anatomical differences and mobility may require small adjustments. The goal is to maintain support and control without seeking an identical measurement for everyone.
Perform the repetition
Ascend with control
From the starting position, push the floor with your feet and extend your hips, lifting the pelvis. Keep the load centered and accompany it with your hands without pulling it upwards. Torso and pelvis move together around the support point, while the feet remain stable.
Reach a comfortable extension in which you can contract the glutes without pushing the pelvis beyond available control. It is not necessary to seek maximum height at all costs. A brief stop can help perceive the position, as long as it does not cause tension or evident compensations in the lumbar area.
Descend and breathe
Bring the pelvis downwards slowly, keeping the barbell stable and the back in contact with the support. Use a range of motion that allows you to restart without bouncing and without losing setup. The controlled descent helps the instructor observe any shifts in feet or load.
Breathing must support torso control and adapt to intensity and instructions received. For a light set you can exhale during the ascent and inhale during the descent, avoiding holding your breath involuntarily. In the presence of particular conditions, the strategy must be defined with the competent professional.
Adjust the technique to the person
Distance and orientation of the feet
If the feet are too far, the user may perceive greater tension in the back of the thigh; if they are too close, they might lose comfort or push through the toes. These are signs to observe, not diagnostic tools. Modify the distance little by little and compare stability and sensations.
Toe orientation can also vary slightly. The knees should follow a trajectory compatible with the feet, without forcing them inward or outward. An instructor can suggest a simple reference and verify that the person can repeat it when fatigue increases.
Range of motion and mobility
The useful range depends on the ability to move the hips while maintaining stable support. If the person feels pressure on the edge or loses control of the torso, temporarily reduce the movement and check height and distance from the bench. The initial goal is a reproducible repetition, not a photographic position.
A dedicated bench can have different shapes and heights. In gym benches the specifications and intended use help compare options, but the actual configuration must allow the person to rest and move according to the model's instructions.
Frequent mistakes to recognize
Hyperextend the lumbar area
Some people seek greater height by arching the back in the final phase. The result can be a position difficult to control, even if the barbell seems to rise more. Ask them to stop when the hip reaches comfortable extension and observe the relationship between chest and pelvis.
An indication like keep your ribs gathered can be useful if understood by the person, but must not turn into a rigid posture. Reduce the load and try slow repetitions when the movement changes significantly. If pain appears, stop the exercise and evaluate the possible need for medical advice.
Push on the toes or lose symmetry
A lifting heel, a slipping foot or a rotating pelvis can indicate that position, load or control require attention. Check the floor and foot distance first, then observe a lighter set. Do not automatically attribute the cause to a single muscular weakness.
If the barbell shifts laterally, check centering, closures and grip. When one side continues to move differently, stop and ask the instructor to evaluate the situation. Correcting with additional weights or increasing speed makes it harder to understand which element is causing the loss of control.
Load, sets and progression
Start from a manageable resistance
To learn the movement use body weight or light resistance. Add load only when the person knows how to enter the position, perform controlled repetitions and exit the station without unexpected assistance. The initial number of sets and repetitions depends on experience and overall program.
The instructor can choose a repetition range that leaves technical margin and observe the last executions. If the range of motion decreases, the load shifts or the torso changes position, it may be appropriate to end the set or reduce the resistance. Fatigue should not erase established safety criteria.
Increase gradually
Progression does not consist solely in adding plates. You can improve control, familiarity with the support and ability to repeat the same trajectory. Record load, repetitions and essential observations, taking into account other exercises and expected recovery times in the program.
When increasing weight, check the practicality of loading and unloading again. Larger plates can modify the space needed to enter the station, while higher loads may require organized assistance. Always respect the declared limits for bench, barbell and accessories.
Manage the station in the gym
Instructions and supervision
A visible chart can remind how to check the bench, position the load and report a problem. Instructions must refer to the equipment actually present, without replacing the initial demonstration. For inexperienced users, a short guided trial allows identifying doubts before the first autonomous set.
Staff should know adjustments, limits and out-of-service procedures. If the bench is moved between stations, check that each area offers adequate surface and space. Users must know where to store plates and barbell to leave the area free for those who follow.
Cleaning and periodic checks
After use, clean contact points with products and methods allowed by the manufacturer. Prevent liquids from penetrating mechanisms and report cuts or looseness. Regular cleaning makes it easier to observe damage, but does not replace technical checks planned for fasteners and moving parts.
Record anomalies, interventions and control date according to facility procedures. If a component does not stay locked or the bench moves abnormally, stop use and involve the competent person. Putting equipment back into service requires proper verification, not an occasional test by a user.
Comments (0)