
Trolley
You have no items in your shopping cart

 Budgets
 Dumbers
 Discs
Discs
 Benches
 Racks and Rigs
 Weights Holders
 Isotonic machines
 Calisthenics
 Cardio
 Kettlebells
 Flooring
 Gym Set
 Accessories
 Combat
 ARTI MARZIALI
 CONTAINER GYM
 Tug-Of-War
 Used Gym Equipment
 PILATES MACCHINARI
 GINNASTICA ARTISTICA
 CAMPI DA PADEL
 Prodotti in Pronta Consegna
 Informazioni
 IRONMAN
 Gift Card
- Donatif
- General information
- 0 I like it
- 756 Views
- 0 comments
- gym flooring, safety flooring, gym safety, shock-absorbing materials
Handstand Tutorial: Balance and Strength for the Perfect Handstand
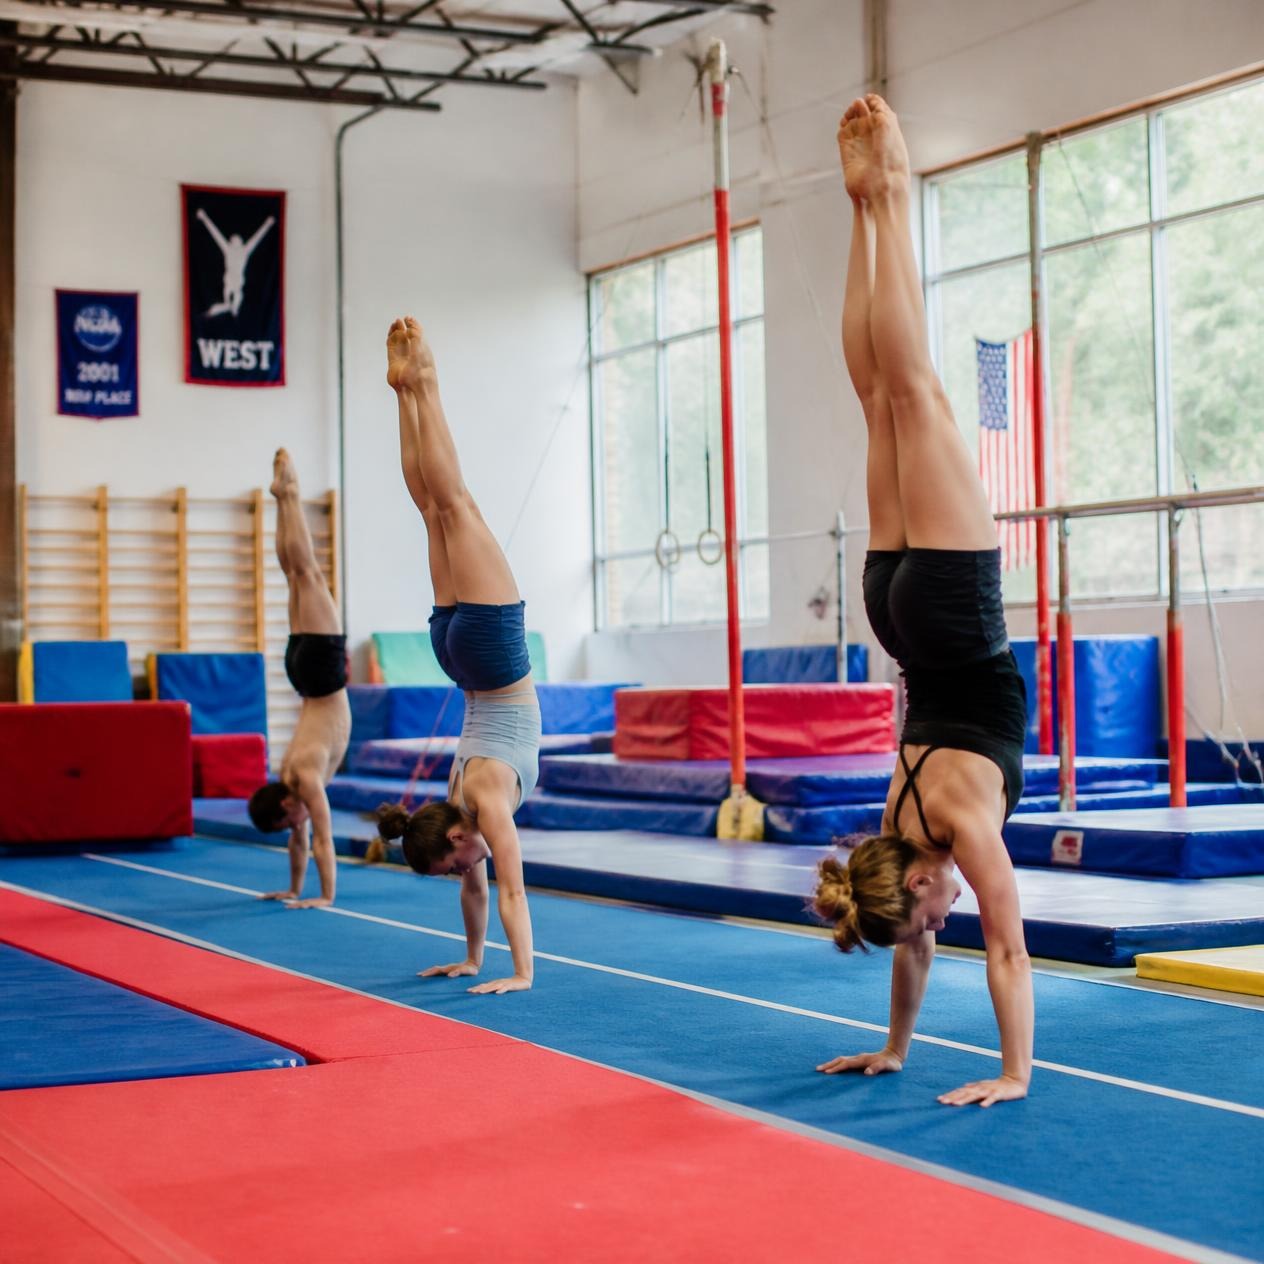
The handstand is one of the most iconic skills in calisthenics. Being able to keep the body perfectly aligned on the hands represents a milestone that combines strength, mobility, coordination, and balance. However, learning it does not simply mean trying to get up on your hands until, by chance, you manage to balance for a few seconds. A true calisthenics handstand tutorial must follow a precise progression, gradually building all the necessary skills to perform the movement safely.
Many beginners give up after a few attempts because they think they do not have enough balance or strength. In reality, most difficulties stem from incomplete preparation: insufficient shoulder mobility, core weakness, poor body awareness, and fear of falling prevent the development of the correct technique.
In this guide, we will analyze step-by-step the path that leads from the first wall handstand to the free handstand, delving into preparatory exercises, technical progressions, mistakes to avoid, and equipment that makes learning safer and more effective.
- The requirements of the handstand
- Building strength and mobility
- The first wall handstands
- Learning balance
- The complete progressions
- Recommended equipment
- Most common mistakes
- Why create a dedicated station
The requirements of the handstand
Before trying a free handstand, it is necessary to develop some fundamental qualities. Shoulder strength is only one of the elements involved. You also need thoracic mobility, pelvic control, core stability, and a good ability to distribute weight on your hands.
Many beginners attribute every mistake to a lack of balance, when in reality the body is not yet able to maintain a correct line. If the shoulders, pelvis, and feet are not perfectly aligned, balance becomes much more difficult to manage.
The good news is that all these skills can be trained progressively. Through specific exercises, it is possible to build an extremely solid technical base before tackling the free handstand.
The importance of alignment
A correct body line reduces the effort required to maintain the position and makes balance much more stable.
The role of the core
The abdomen, glutes, and lumbar muscles work continuously to keep the body compact and prevent the back from arching excessively.
Building strength and mobility
The shoulders are the main engine of the handstand. They must be strong enough to support body weight while simultaneously maintaining high joint stability.
Before dedicating yourself to inversions, it is advisable to include preparatory exercises such as Pike Push Ups, Wall Walks, Planks, Hollow Body Holds, and shoulder girdle mobility work. These exercises progressively improve the ability to support the body on the hands.
The wrists also deserve special attention. Being subjected to high loads, they must be prepared through mobilizations, strengthening exercises, and a gradual increase in the time spent in support.
Developing strong shoulders
Training the deltoids, trapezius, and scapular stabilizers allows you to maintain constant pressure throughout the handstand.
Preparing the wrists
A good joint warm-up reduces the risk of discomfort and makes every training session more comfortable.
The first wall handstands
The wall is the best ally during the first stages of learning. It allows you to focus on alignment without constantly worrying about falling.
There are two main ways to use it: back to the wall or chest facing the wall. The latter variant requires greater postural control and helps build a more correct body line.
Initial sessions should prioritize the quality of the position over the duration of the hold. Maintaining a correct handstand for a few seconds is much more useful than staying in an incorrect posture for a long time.
Handstand with back to the wall
This variant helps you get comfortable with the load on your hands and overcome the initial fear of inversion.
Handstand with chest to the wall
It promotes better alignment and prepares you more effectively for the free handstand.
How to develop balance on your hands
Balance in a handstand does not depend on large body movements but on small adjustments made mainly through the fingers. Learning to correctly distribute pressure between the palm and fingers is one of the most important steps in the entire journey.
Weight transfer exercises, small detachments from the wall, and assisted holds allow you to gradually develop this sensitivity without exposing yourself to sudden falls.
Breathing also influences control. Maintaining a regular rhythm helps reduce unnecessary tension and makes the body more stable during the position.
The hands control the handstand
The fingers function like feet when standing: they continuously regulate the center of gravity through almost imperceptible micro-corrections.
Learning to fall
Knowing the techniques for exiting a handstand eliminates much of the initial fear and accelerates learning.
The best handstand progressions
Every athlete progresses at different speeds, but the sequence of progressions should follow a precise logic. Skipping fundamental steps slows down learning and increases the risk of consolidating technical errors.
An effective progression includes preparatory exercises, wall handstands, controlled detachments, short balance holds, and a progressive increase in time in the free position.
During each phase, it is useful to record your attempts to observe alignment, shoulder position, and pelvic control.
Following an orderly progression
Each exercise prepares for the next, gradually building all the skills necessary for the full handstand.
Evaluating improvements
Filming your workouts allows you to quickly identify technical errors that are difficult to perceive during execution.
Recommended equipment for the handstand
Although it is a bodyweight skill, some equipment greatly facilitates learning. Low parallettes reduce wrist extension and make the position much more comfortable, especially during the first weeks of training.
A high-density mat also increases safety during exercises, offering a stable and comfortable surface for attempts and controlled exits from the handstand.
To create a complete station, you can use professional calisthenics parallettes, combined with mats and accessories designed to support the progressive learning of inversions.
Why use parallettes
Parallettes decrease stress on the wrists, improve grip, and allow for longer and more comfortable training sessions.
The role of the mat
A stable surface protects you during initial attempts and increases the beginner's psychological safety.
The most effective handstand exercises and mistakes to avoid
Many practitioners spend all their time attempting free handstands while neglecting preparatory exercises. This approach slows down improvements because it does not develop the skills necessary to actually maintain balance.
Among the most frequent mistakes are inactive shoulders, an excessively arched back, lack of core activation, and rushing to move to the free handstand without consolidating the work at the wall.
Regularly including mobility exercises, shoulder strengthening, Hollow Body Holds, Pike Push Ups, and Wall Walks significantly accelerates progression while maintaining high technical quality.
Don't be in a hurry
The handstand is a technical skill that requires quality repetitions and patience. Rushing rarely produces better results.
Train consistently
Short but frequent sessions are generally more effective than very long and sporadic workouts.
Why create a dedicated station
Learning the handstand requires consistency and an environment that encourages daily practice. Having a dedicated space, with parallettes, a mat, and stable surfaces, allows you to train safely and focus exclusively on the quality of the movement.
A station designed with professional equipment also offers greater comfort during progressions and reduces stress on the wrists and joints, making every session more pleasant. This aspect becomes particularly important when training volume increases and you dedicate many minutes to technical practice.
By following a gradual path, developing strength, mobility, and body control, anyone can transform the handstand from an apparently impossible exercise into a stable and controlled skill. The combination of method, patience, and adequate equipment represents the most effective way to achieve a solid handstand and build the foundation for all future calisthenics progressions.
Comments (0)